Patrick Blanc: The Vertical Garden from California Academy of Sciences on FORA.tv
Friday, December 30, 2011
Patrick Blanc Presentation at the Academy of Sciences San Francisco
Found this over at Nori's site. I feel like I ran across it once before but I neglected to post it. Don't think I even saw the whole thing. Looking forward to it. So here it is for anyone else who missed it.
Sunday, May 15, 2011
My Youtube Account Hacked/Canceled. Greenwall Time Lapse Reposted
Last week my youtube account was shut down. As far as I can tell it was either hacked or closed due to copyright infringement (I was using music I didn't own on one of my videos). I reposted my time lapse greenwall planting video with music by Omniphobe; my friend Eef's band.
I need your help. If you know a blog where my old video was posted can you please let them know that I reposted it here. Thanks.
I also posted the video on the Internet Archive Community Video project so please feel free to re-post/re-purpose it.
http://www.archive.org/details/DiyHowToMakingOfPatrickBlancStyleGreenWallVerticalGarden
The original video is still posted here.
http://vimeo.com/4267171
Friday, May 6, 2011
Sophie's Questions
Sophie asked some questions about getting a wall started:
Here are the answers to your questions Sophie:
1. The first layer is the frame. Usually that's made of aluminum or wood. Then there's a waterproof layer of plastic. Lately I have been using recycled corrugated polyethylene sheeting; 2 sheets 6mm thick layered to make 12mm.
2. Click here to see the MRM that I use. It is 3/16" thick and in my experience has been thick enough. I have seen some Blanc walls that have used an even thinner material. The material is stapled to to the plastic in two layers. The cuts for pockets are only made to the first layer.
3. The dirt from the pot is left around the roots.
Because you are making a wall outside you should also consider adding a plastic woven or pierced layer behind and in between you MRM sheets. See this post for more info.
Good Luck,
Matt
Hi Matt,
I´ve read your blog with great interest and I have some questions on the construction of a green wall meant for the outdoor. As far as I can understand there is first a layer of treated wood or pvc, attached to that is a mesh of stainless steel and the comes the fabric. And here is my question. I´ve been looking at the MRM, but to me it doesn´t seem thick enough for cutting and putting in the plants? How thick is it? And does it only need one layer? Does the cutting of the holes go the whole way through?
Also when the plants are out into the holes, are the roots then cleaned for dirt?
This was just some practical wondering that I hope you may be able to help me with.
Best regards
/Sophie
Here are the answers to your questions Sophie:
1. The first layer is the frame. Usually that's made of aluminum or wood. Then there's a waterproof layer of plastic. Lately I have been using recycled corrugated polyethylene sheeting; 2 sheets 6mm thick layered to make 12mm.
2. Click here to see the MRM that I use. It is 3/16" thick and in my experience has been thick enough. I have seen some Blanc walls that have used an even thinner material. The material is stapled to to the plastic in two layers. The cuts for pockets are only made to the first layer.
3. The dirt from the pot is left around the roots.
Because you are making a wall outside you should also consider adding a plastic woven or pierced layer behind and in between you MRM sheets. See this post for more info.
Good Luck,
Matt
Sunday, April 24, 2011
Great Mobile Geenhouse Project
Hi,
My friend's brother is making this awesome mobile greenhouse to teach people about sustainable living. They need some help to reach their kickstarter goal so please pledge if you can.
Thanks,
Matt
Learn more below.
My friend's brother is making this awesome mobile greenhouse to teach people about sustainable living. They need some help to reach their kickstarter goal so please pledge if you can.
Thanks,
Matt
Learn more below.
Friday, April 22, 2011
Simple Greenwall How to on the Nate Berkus Show
My wife and I were featured on the Nate Berkus Show's House Proud segment. At the very end I got to do a small greenwall planting demo.
Saturday, February 26, 2011
Phillip's Making of Video
Phillip sent me a making of video for his wall. I love to see the process behind the creation of people's walls. Thanks for making and sharing this Phillip.
At the end of the video you can see Phillip's first wall that he gave to his Mom. Phillip said:
At the end of the video you can see Phillip's first wall that he gave to his Mom. Phillip said:
I forgot to tell you that 1 great thing with vertical gardens is its transferable. i just changed some plants on my first attempt and gave it to my mom to transform her dull wall to a lush greenery. funny thinking about a garden being transported by a van...
Irrigation Filter Install
So for awhile now I have been mentioning how important it is to have a filter on your irrigation system. Mine never really had one and I wasn't very good at keeping dirt and plant matter out of my basin. Periodically I would have to take down my irrigation hose and clean out the clogged holes with a paperclip while running water through it. This was a time consuming process.
 This is the hose waiting to be cleaned in my bathtub.
 This is how I close off the end of the hose. In order to clean it I have to remove the hose clamps so that I can get water flowing out the end.
 While I had the irrigation apart I thought I'd take a photo of this T splitter. As you can see the tube that brings the water up from the pump is quite large. But then the splitter steps it down to a thinner size for the tubes that run across the top of the wall. This was recommended by the person who helped set up my pump system. The idea was that you wanted less pressure (a wider hose) when you were pushing water up vertically. When you got to the top and you were pushing horizontally you could use a thinner hose. This isn't 100% necessary but if you can do it it makes sense.
 This is the filter I bought. Technically it's called a strainer. I bought it from here. It was the wrong size unfortunately (too small) so I added little sleeves to it so that it would fit. This is the filter with the sleeves.
 I originally thought this would fit on the vertical tube running up from the pump before it hit the T. I was so off with the size estimate that it was even too small for the horizontal tube. With the sleeves it fits but I can only have it on one side of the T. I chose to put it on the longer side. The short side is much easier to clean should it ever clog again.

 I finally cleaned the sponge that the filter came with. I don't know why I didn't do this sooner. I also cleaned out the basin around the filter. There was quite a bit of dirt and decomposing leaves. Also that weird white Styrofoam stuff they put in soil. That stuff was the biggest pain. After I cleaned the sponge I added this mesh bag over it that I had from a my fishtank. It's a very fine mesh and should prevent most things from even getting into the pump in the first place. The mesh came from one of these.
When I emptied the basin I learned that my basin holds far less water than I thought. Originally I estimated it at around 35 gallons. In reality my basin holds less than 15 gallons. I add 5 gallons to it every 2 days to keep up with water loss. So my wall uses roughly 2.5 gallons of water a day for 80sqft.
These are the things to learn from my mistakes. Don't let dirt and plant matter get in your basin to begin with. If possible plant your wall before adding your basin. When you need to remove plants to replace them make sure the basin is well covered. Have two filter systems for a backup just in case. I now have one at the pump and one in the hose.
Wednesday, February 16, 2011
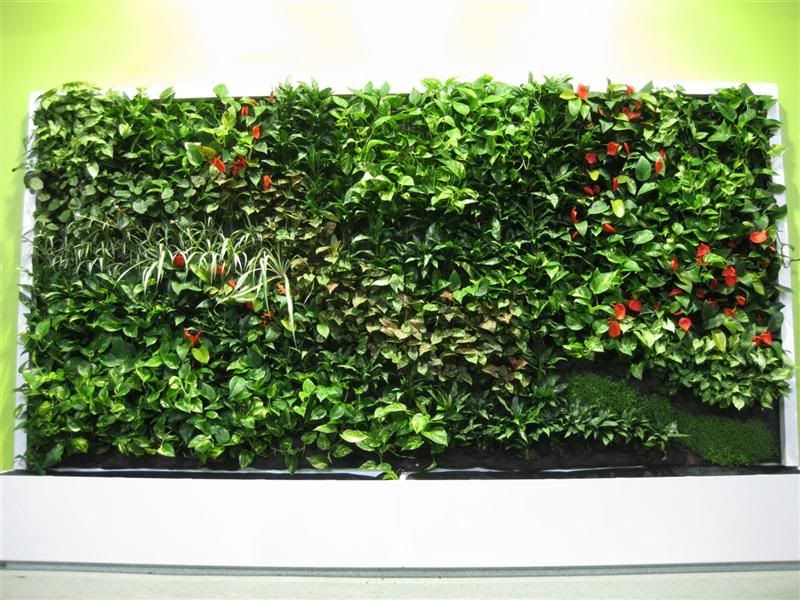
Lushe's "Regeneration Wall"
This beautiful wall was just completed in Australia by Lushe. I'm particularly glad they documented the process. They used marine plywood as a base which is something that's readily available in most places. Also they used Baby's Tears which is a beautiful small leafed plant.
Wednesday, February 9, 2011
Carlos' Wall Un Año Después
Carlos posted a great time lapse video of an update to his wall.
It sounds to me that Carlos may have been over watering a bit for his climate if he was struggling with oxgenation and fungal and bacterial infections. Make sure you set your watering cycles to allow your wall to dry off. Most plants need wet and dry cycles.
It's great to see Carlos sticking with his wall and updating it.
Thanks for the update Carlos.
Matt
Hi Matt
After nearly a year, a fungal infection, pests and several dead plants I want to share the restoration of my Vertical Garden Patrick Blanc style.
http://www.youtube.com/watch?v=741_YPmpi5o
I learned a bit in this process, for example, something important is to improve ventilation to avoid the appearance of fungal and bacterial infections, so I put a ceiling fan near the vertical garden. I changed the felt by one of lesser quality, which has a more open fabric for increasing oxygenation and ventilation of the roots and substrate. Also, I changed the substrate by a sphagnum peat moss, I hope this help to a better plant growing. Related to the pests, I have to tell you that in my tropical town is a headache, particularly Planococcus insects, this kill some plants and weakened other. Finally about my first video, I have put some notes in Spanish that explain a little the construction process.
Congratulations for keeping live your great blog
Regards
Carlos Pacheco
It sounds to me that Carlos may have been over watering a bit for his climate if he was struggling with oxgenation and fungal and bacterial infections. Make sure you set your watering cycles to allow your wall to dry off. Most plants need wet and dry cycles.
It's great to see Carlos sticking with his wall and updating it.
Thanks for the update Carlos.
Matt
Wednesday, January 12, 2011
No more pump sucking
Forgot to mention that I changed my irrigation setting a few weeks ago. The pump was running too long per watering and the basin would get very low and the pump would make a sucking noise. So I timed the watering until the pump made a noise and used that for my baseline. I think I went from watering about 4 times a day for 8 minutes to watering 7 times (every 2 hours) a day 2 minutes per watering. Not very scientific but it hasn't affected the plants at all and now I don't have to hear the pump sucking. Bear in mind that the actual water volume probably hasn't changed much because when the basin got low the water volume being sucked up was greatly reduced.
Phillip's Update
I love it when people send me updates on how their wall is doing. This one is from Phillip in The Phillipines. Phillip first wrote in to tell me about the alternative materials he used to make his wall. I was particularly impressed when he used speaker cabinet fabric for his moisture retention material. He proves that almost any dense synthetic felt can work. Here's Phillips update:

Hi matt,
i just pruned my vertical garden, my copea's started to bud and new offsprings of bromeliads can be seen. sent pictures as to the condition of my vertical garden it looks good but i think I have to change the prayer plant and the fern because its in direct sunlight and leaves start to get burnt. Im thinking of building my next green wall next week. ill keep you posted.
thanks
phillip

Fabian's Update
So Fabian wrote in with an update on the amazing wall he worked on in Bangalore India. Fabian first wrote in when he was trying to source moisture retention fabric in India for the Jaaga Living Building project.
The project has come a long way since those cool mock ups. Here's the update:


Click here to see more photos of the Jaaga Living Building project.
The project has come a long way since those cool mock ups. Here's the update:
Hey Matt,
long time no update.
It takes quite a loooong time to find the right plants for the wall.
Plants that can take the rough Indian environment and the not
so well watersoaking coir felt.
Still testing with drip irrigation and different times of watering.
Check out some pictures:
http://www.fabsn.com/theblog/2011/01/india-vertical-garden-update/
Cheers
Fabian
Click here to see more photos of the Jaaga Living Building project.
Greenwall in a picture frame on Etsy
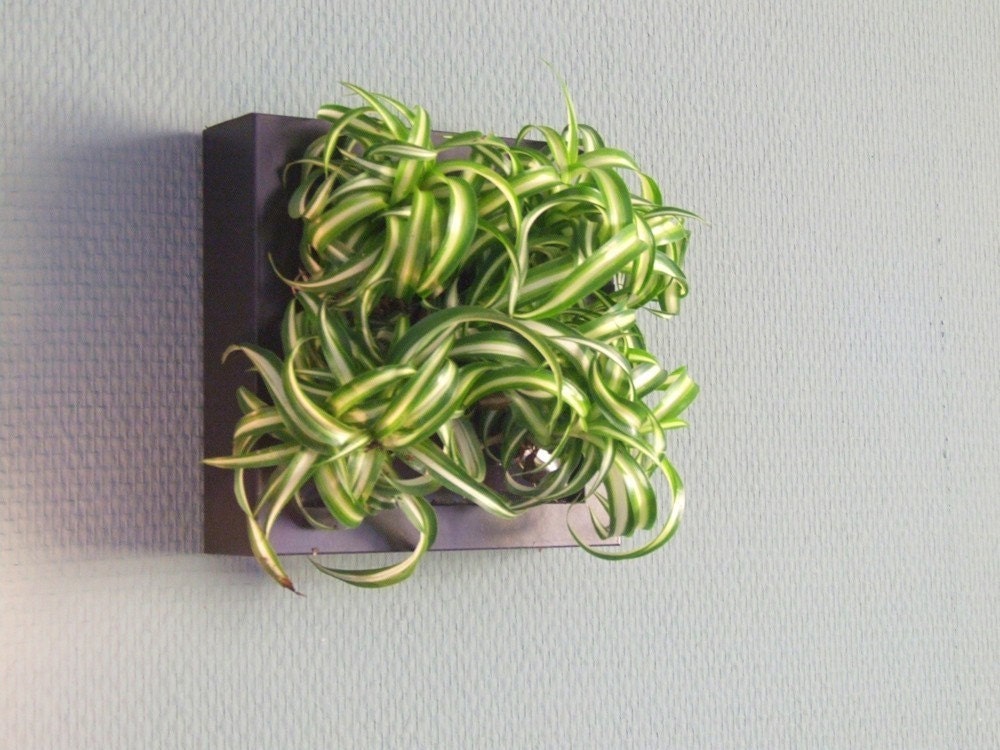
I don't normally post about greenwalls I run across online. There are already great sites for that like Lushe, but this greenwall in a frame on Etsy was too cute to pass up.
Sam's Update
Sam originally contacted me about damp smell that was coming from his greenwall, in his restaurant in Auckland New Zealand, with over 1,500 plants. Sam sent me a great update with some beautiful pictures.
Sam wrote:


I am also a planted fishtank keeper and Sam's bacteria problem seems strange to me. Instead of adding something that kills bacteria I'd rather see him add something that establishes a healthy colony of good bacteria. All planted fishtanks have aerobic and anaerobic bacteria living together and healthy tanks do not have an odor. The basin of a greenwall is like a simple pond/fishtank in many ways. I add aquatic snails and worms to my basin to help breakdown plant material and add a natural fertilizer source.
Sam also mentions blocked pipes. I can't stress enough how important it is to include inline filters between your pump and your irrigation tube. Without these filters you will need to check your tubes for clogs like Sam and I. I still haven't retrofitted a filter to my system so I periodically take the top irrigation tube down and clean it out. I also do some spot unclogging with a paper clip. All of which could be avoided with a good filter.
Sam's wall looks amazing and is by far one of the most ambitious walls that was ever inspired by this site. Congratulations Sam!
Sam wrote:
Hi Matthew,
These are some of the better pictures, they were taken to profile the restaurant directly, not so much for the wall itself, but I how they suit.
The wall is made up of 1700 plants, over a 6m high x 4m wide wall, that returns around on one side (the left) so its double sided for 2m .
The plants are mainly peace lily's, boston and hen& chicken ferns, and spider plants, planted into 3 layers of Hydrotech felt (which we got from you), secured back to the same ply that you used, fixed to a steel frame. We used steel as the weight of our wall was so much.
The trough at the bottom is custom made stainless steel trough, clad with raw steel for the right look - the water in the pump is then reticulated through pipework at the top of the wall by a pump. We have 5 hydroponic lamps set up to go on for 8 hours a day overnight.
We PH test, add nutrients (including clearwater), clear blocked pipes, and check all plants twice weekly... and flush out the trough once per week...
so two months in, the wall is really flourishing, it takes a fair bit of work to keep it this way though! The great thing about your style of wall is that you can get it looking amazing from the first day of installation, and you can put it together yourself if you do your homework, and get some good people to help you out.
The smell has diminished substantially also with the addition of 'clearwater' to kill of the odour causing bacteria.
So... finally... cheers for your blog and you tube post!
cheers


I am also a planted fishtank keeper and Sam's bacteria problem seems strange to me. Instead of adding something that kills bacteria I'd rather see him add something that establishes a healthy colony of good bacteria. All planted fishtanks have aerobic and anaerobic bacteria living together and healthy tanks do not have an odor. The basin of a greenwall is like a simple pond/fishtank in many ways. I add aquatic snails and worms to my basin to help breakdown plant material and add a natural fertilizer source.
Sam also mentions blocked pipes. I can't stress enough how important it is to include inline filters between your pump and your irrigation tube. Without these filters you will need to check your tubes for clogs like Sam and I. I still haven't retrofitted a filter to my system so I periodically take the top irrigation tube down and clean it out. I also do some spot unclogging with a paper clip. All of which could be avoided with a good filter.
Sam's wall looks amazing and is by far one of the most ambitious walls that was ever inspired by this site. Congratulations Sam!
Subscribe to:
Posts (Atom)