So for awhile now I have been mentioning how important it is to have a filter on your irrigation system. Mine never really had one and I wasn't very good at keeping dirt and plant matter out of my basin. Periodically I would have to take down my irrigation hose and clean out the clogged holes with a paperclip while running water through it. This was a time consuming process.
 This is the hose waiting to be cleaned in my bathtub.
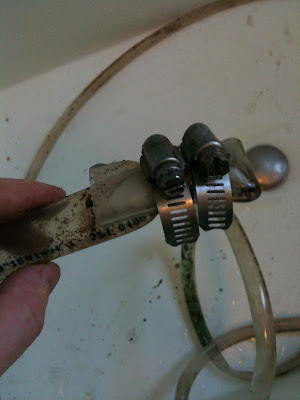 This is how I close off the end of the hose. In order to clean it I have to remove the hose clamps so that I can get water flowing out the end.
 While I had the irrigation apart I thought I'd take a photo of this T splitter. As you can see the tube that brings the water up from the pump is quite large. But then the splitter steps it down to a thinner size for the tubes that run across the top of the wall. This was recommended by the person who helped set up my pump system. The idea was that you wanted less pressure (a wider hose) when you were pushing water up vertically. When you got to the top and you were pushing horizontally you could use a thinner hose. This isn't 100% necessary but if you can do it it makes sense.
 This is the filter I bought. Technically it's called a strainer. I bought it from here. It was the wrong size unfortunately (too small) so I added little sleeves to it so that it would fit. This is the filter with the sleeves.
 I originally thought this would fit on the vertical tube running up from the pump before it hit the T. I was so off with the size estimate that it was even too small for the horizontal tube. With the sleeves it fits but I can only have it on one side of the T. I chose to put it on the longer side. The short side is much easier to clean should it ever clog again.

 I finally cleaned the sponge that the filter came with. I don't know why I didn't do this sooner. I also cleaned out the basin around the filter. There was quite a bit of dirt and decomposing leaves. Also that weird white Styrofoam stuff they put in soil. That stuff was the biggest pain. After I cleaned the sponge I added this mesh bag over it that I had from a my fishtank. It's a very fine mesh and should prevent most things from even getting into the pump in the first place. The mesh came from one of these.
When I emptied the basin I learned that my basin holds far less water than I thought. Originally I estimated it at around 35 gallons. In reality my basin holds less than 15 gallons. I add 5 gallons to it every 2 days to keep up with water loss. So my wall uses roughly 2.5 gallons of water a day for 80sqft.
These are the things to learn from my mistakes. Don't let dirt and plant matter get in your basin to begin with. If possible plant your wall before adding your basin. When you need to remove plants to replace them make sure the basin is well covered. Have two filter systems for a backup just in case. I now have one at the pump and one in the hose.